Classlist Community Rep How Tos
As Reps, you will be assigned the "Community Rep" role in Classlist. This gives you some administrative capabilities, and this page walks through a few of the most commonly used features.

Announcements
Did you know that you can create an Announcement tailored just for your group?
It will show up in the group like a post, and also show up in the “Announcement” tab for group members.
Why use an Announcement vs a Post?
Announcements allow you to see the perecentage of your audience who viewed it. This lets you get a sense of whether you are hearing crickets because no one saw your information, or whether people saw it but don’t interact with it for some other reason.
To create an Announcement, select it from the drop down menu when you hit the “pencil” button from your home screen. Any Community Rep (which you all are) has the permissions to create announcements. Just please keep the audience limited to your particular group.
Community Events

Unlike Private events, such as you might use for your kid's birthday party, Community Events are meant to invite groups of people, like a whole grade if you are a Grade Rep, or your Nationality/Language group or Social Interest group.
Community Events have some features that make them really helpful for organizing, especially the ability to have multiple event owners, signup lists, and the ability for the event to be shared outside of Classlist.
To Create a draft Community Event, click the same pencil icon from your homescreen as pictured above. You will see a drop down menu of things you can create, among them, "Community Event" located under "Admin Options".
The next page goes into more details. Here you can add an event description and location (this defaults to the school address). Towards the botton you can add other community reps to be event owners with you. Only other community reps can co-own community events.
The Sign up Lists are very useful for organizing both volunteering times and item/food donations.
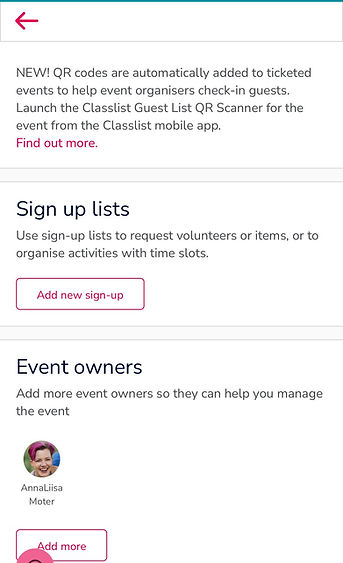
Click "Add a new sign-up", and add a title and overview/description.
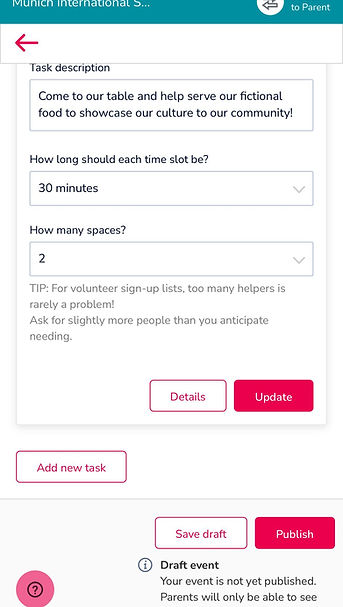
You can then add different tasks to your sign up list. For item/food donation, you don't need time slots, since it's not time based, so you can choose "No time slots required".
For volunteer time slots, choose the correct length from the drop down menu and describe the task being requested, and how many people per time slot you need.
Hit Save. and then "Save draft" below that to save your changes to the event.
We recommend saving your community event until you have had a chance to review it.
Once you saved it, you will see the preview. To make further changes, hit the "Menu" button and select "Edit".
To add guests, select your group from the Select Groups button under "Guest List".
When you are ready, hit "Publish", and the event will be distributed to the group members. It will show up in the group feed, and in their "Events" tab.
